Learn Linux - LVM Basics
Linux LVM Guide: Master Logical Volume Management for Flexible Storage
Logical Volume Manager (LVM) is a powerful tool in Linux that adds an abstraction layer between the physical disk and the mounted block device. This extra layer provides a lot of additional functionality, such as snapshots, resizing, and much more. In the following articles, we will explore the ins and outs of LVM.
Basic Architecture
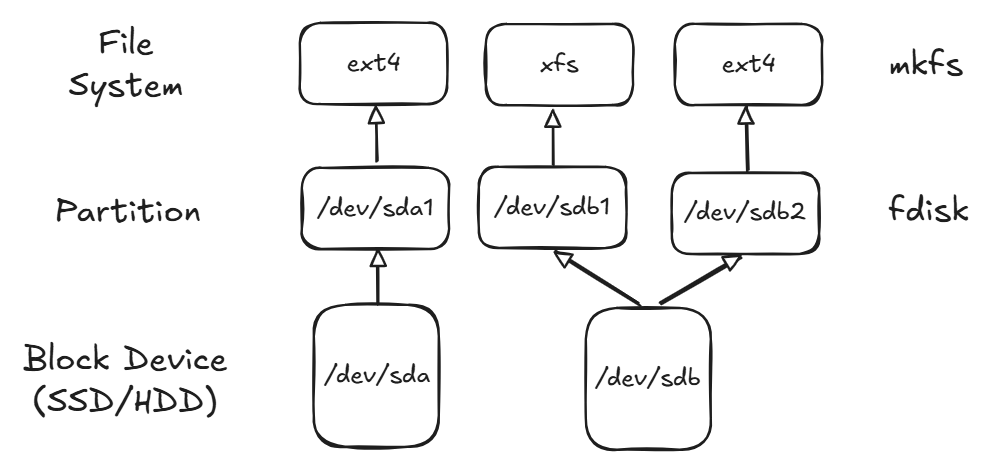
To understand the use case of LVM, we first need to look at the standard architecture of File Systems in Linux. At the bottom, you start with a Block Device to which a Partition Table will be added. There are two well-known possibilities: the old Master Boot Record (MBR) or the new GUID Partition Table (GPT). If possible, always use GPT; there, you aren't limited to four 2TB partitions. After the Partition Table, you create a Partition on the Block Device. On top of the Partition, a File System like ext4 or xfs will be installed. After all these steps, the File System can be mounted in the system. With this setup, there are some limitations. For example, you can't increase the size of a Partition if the Block Device is full or if there is another Partition directly after it. LVM adds additional layers which help mitigate these limitations.
LVM Architecture
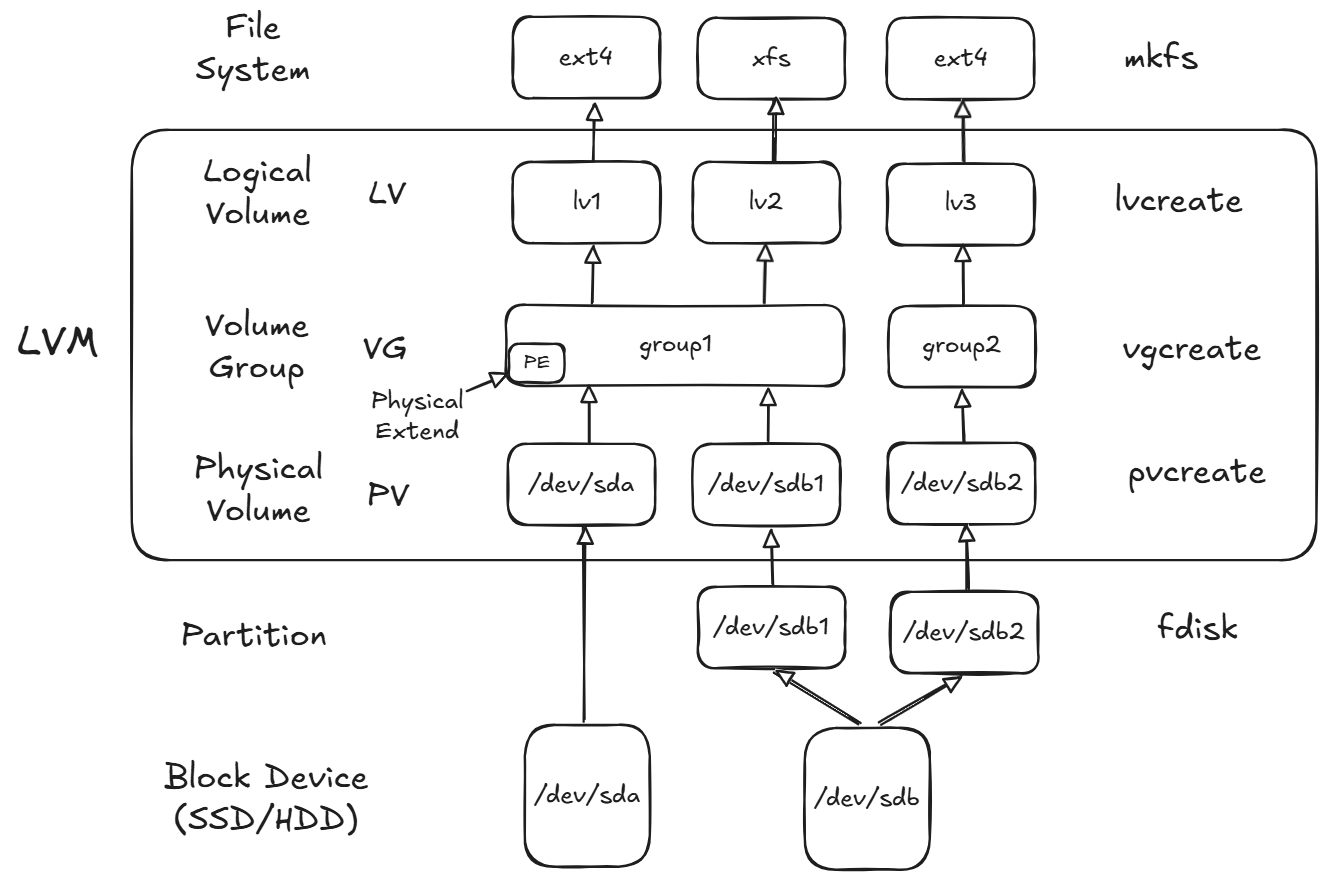
With LVM, there will be three additional layers. At the bottom, there is the Physical Volume (PV), which can be created from a Block Device or a Partition. From the PV, a Volume Group (VG) will be created. A PV can only be a member of one VG, but the VG can have multiple PVs. The VG is composed of multiple Physical Extents (PE), which will be, by default, of the size of 4 MiB. Normally, this value doesn't need any modification. On top of the Volume Group, there will be the Logical Volume (LV). Here, you will get the big advantages of LVM. With this approach, the LV can grow and shrink in size, only bound by the size of the VG. If the storage gets full, you can always add new disks via a PV to a VG and then extend the LV. If you want, you can also use different RAID types for the created LV. All in all, LVM is quite powerful and allows a lot of options.
Setup LVM
In the following example, we will set up LVM on an Azure virtual machine with two additional 1 TiB Block Devices, here called sdc and sdd.
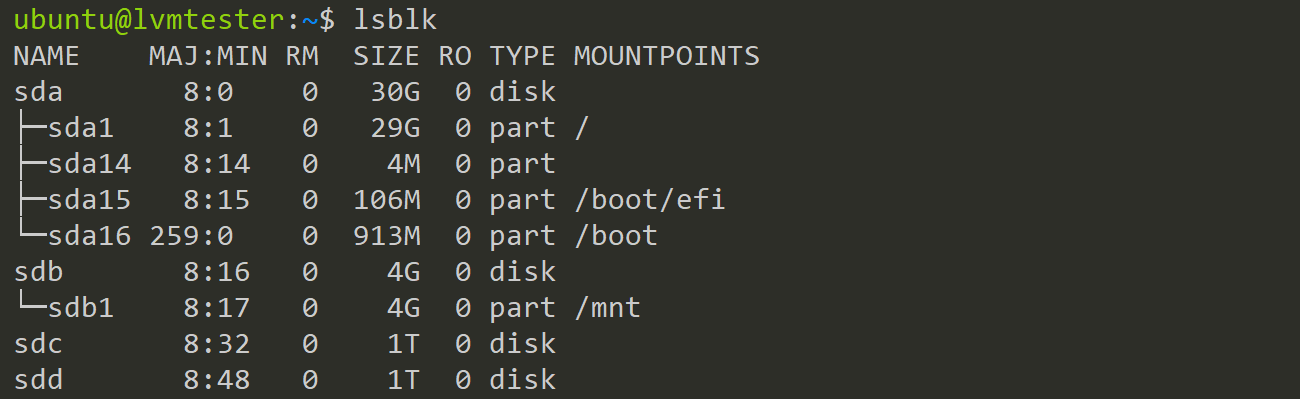
List available Block Devices
With the lsblk command, we can list all available Block Devices and their information.
lsblk
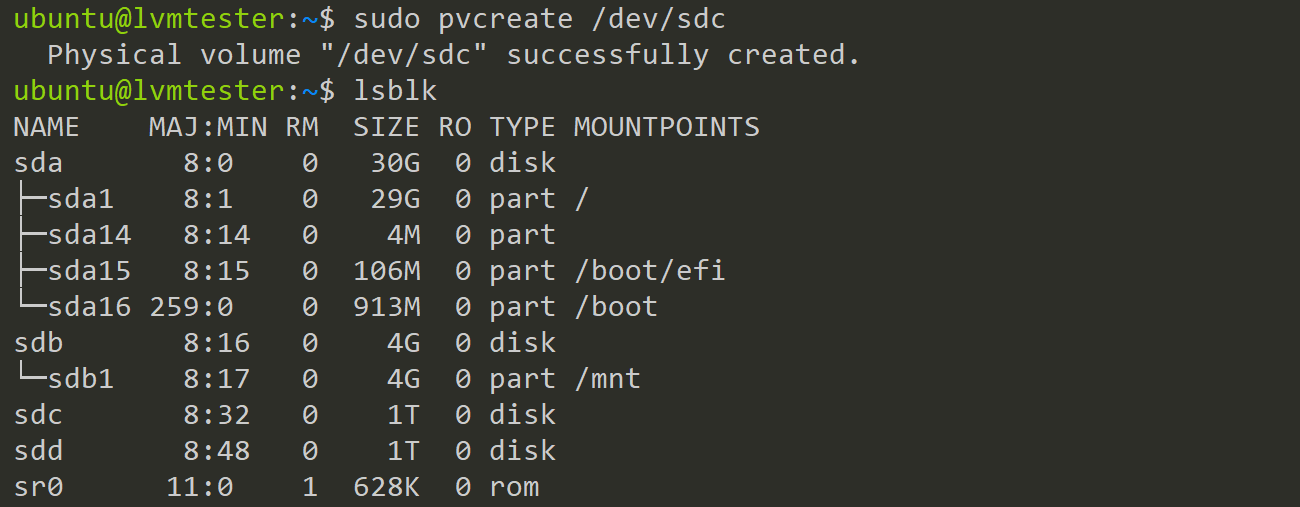
Create a Physical Volume
After identifying the Block Devices we want to use for LVM, we start to create a PV from them. When a PV has been created successfully, there aren't any direct changes visible on the Block Device itself.
sudo pvcreate /dev/sdc

lsblk
To see the newly created PVs, use the pvs or pvdisplay command.
sudo pvs

sudo pvdisplay

Create a Partion on a Block Device
For the second Block Device, we want to create two partitions, each with a size of 512 GiB. For this, we will use the fdisk command and specify the Block Device.
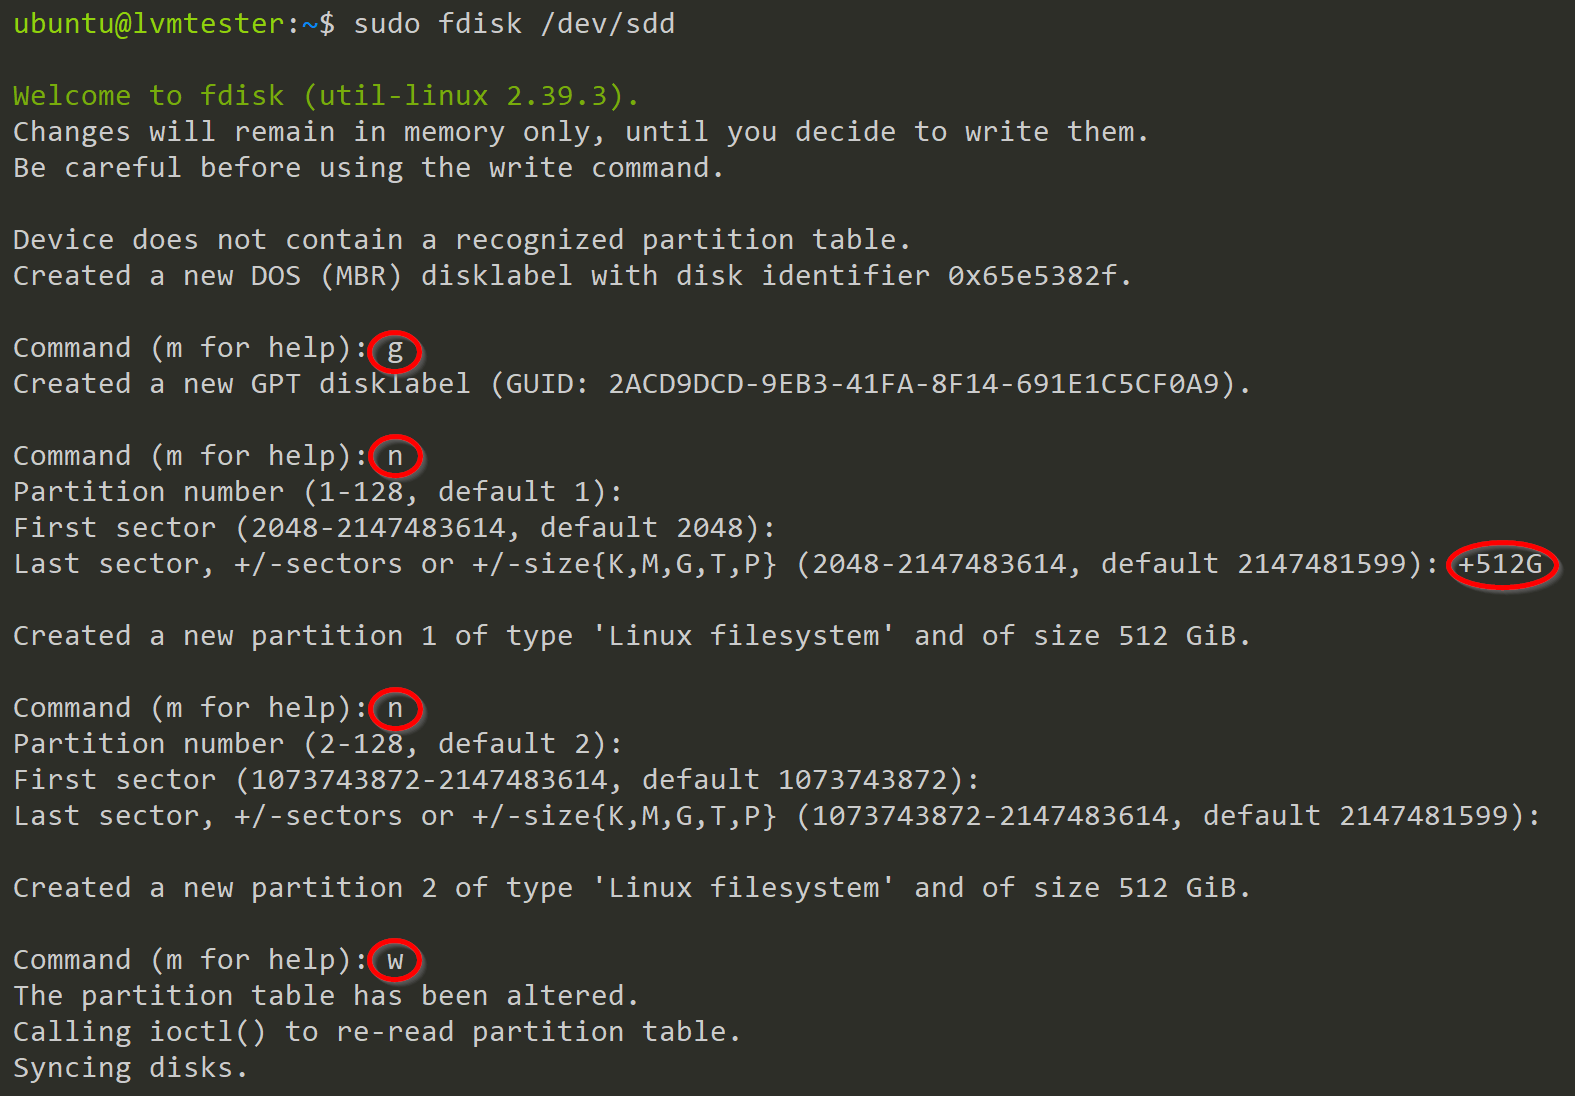
After calling fdisk, you get an interactive window where you can configure the Block Device. We first start with g to create a GPT Partition Table. After this, we press n to create a new Partition. Then, we press Enter twice to accept the defaults for the partition number and the first sector. Now, we specify the size of the partition with +512G. For the second partition, we start with n and press Enter three times to accept the defaults. After this, the device is configured, and we need to write this information onto the disk. For this, we use the w option.
After calling lsblk again, we can see the two newly created partitions. These partitions will also become PVs to be used in a VG in a later step.
lsblk

sudo pvcreate /dev/sdd1 /dev/sdd2
sudo pvs

Create Volume Groups
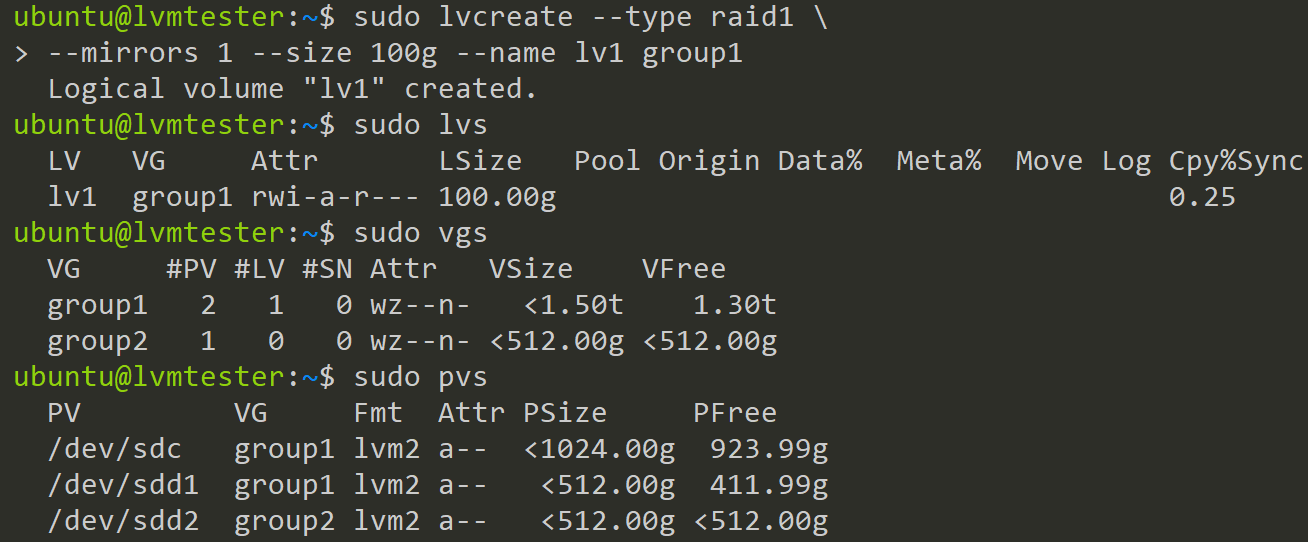
The PVs from the previous step can now be combined into VGs. In this example, we will create two VGs: one with a size of 1.5 TiB and one with a size of 512 GiB. You can use the vgs command to see the newly created VGs and their sizes. The pvs command will show you which PVs are assigned to which VG.
sudo vgcreate group1 /dev/sdc /dev/sdd1
sudo vgcreate group2 /dev/sdd2

sudo vgs
sudo vgdisplay

sudo pvs
sudo pvdisplay

Create Logical Volumes
Now, onto the most important task: creating the LVs which will later be used for storage. As mentioned earlier, there are a lot of different options for configuring LVs. Here, we will look into creating a RAID 1 LV and a standard (non-RAID) LV.
Create a RAID1 LV
Creating an LV is quite easy; you only need to specify the VG, the size and the name of the LV. In this case, we will create one with RAID 1, so the important part is the --mirrors 1 option, which defines how many copies of our LV will be created. Here, we specify one because we only have two PVs assigned to our VG. Because of the RAID 1 configuration, we can't specify a size bigger than 512 GiB, because it won't fit onto the second PV.
sudo lvcreate --type raid1 \
  --mirrors 1 --size 100g --name lv1 group1

sudo lvs
sudo lvdisplay

sudo vgs
sudo vgdispaly

sudo pvs
sudo pvdisplay
Create a normal LV
To create a simple LV, we only need to specify its size and name.
sudo lvcreate --size 100g --name lv2 group2

sudo lvs

Inspect LVs
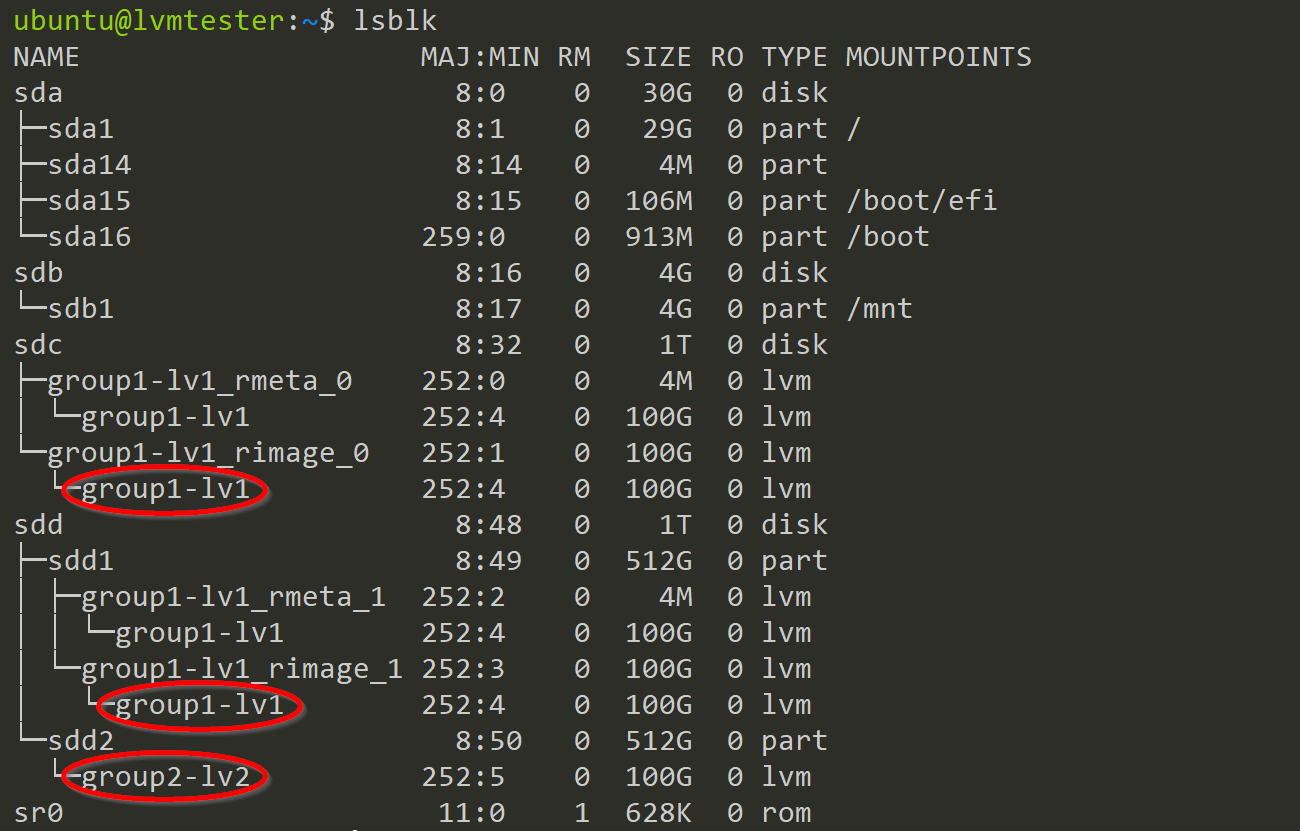
When looking at the output of lsblk, you can see the two LVM devices added. For the group1-lv1 device, there are two entries, one on sdc and one on sdd1. These occur because we configured it as RAID 1. For the group2-lv2 device, we only have an entry on the sdd2 Partition.
Create a File System
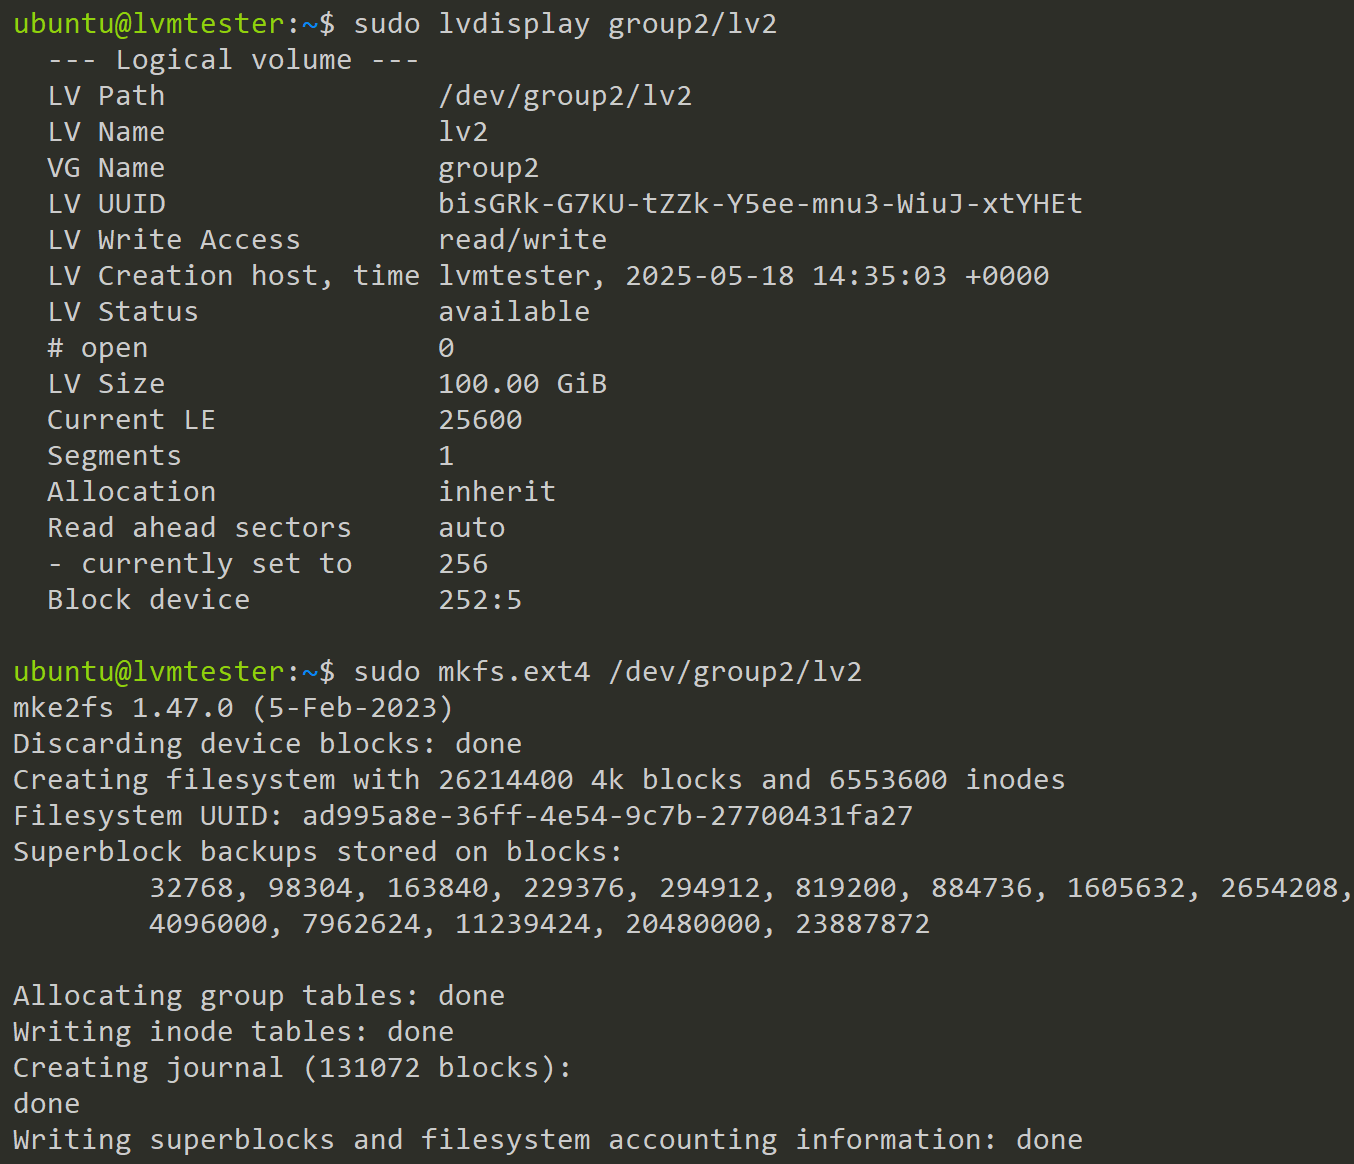
After successfully adding the new LVM devices, we need to create a File System on them. For this, we first call the lvdisplay command to see the path to the device. After this, we use mkfs.ext4 to create an ext4 File System on it.
sudo lvdispaly group2/lv2

sudo mkfs.ext4 /dev/group2/lv2
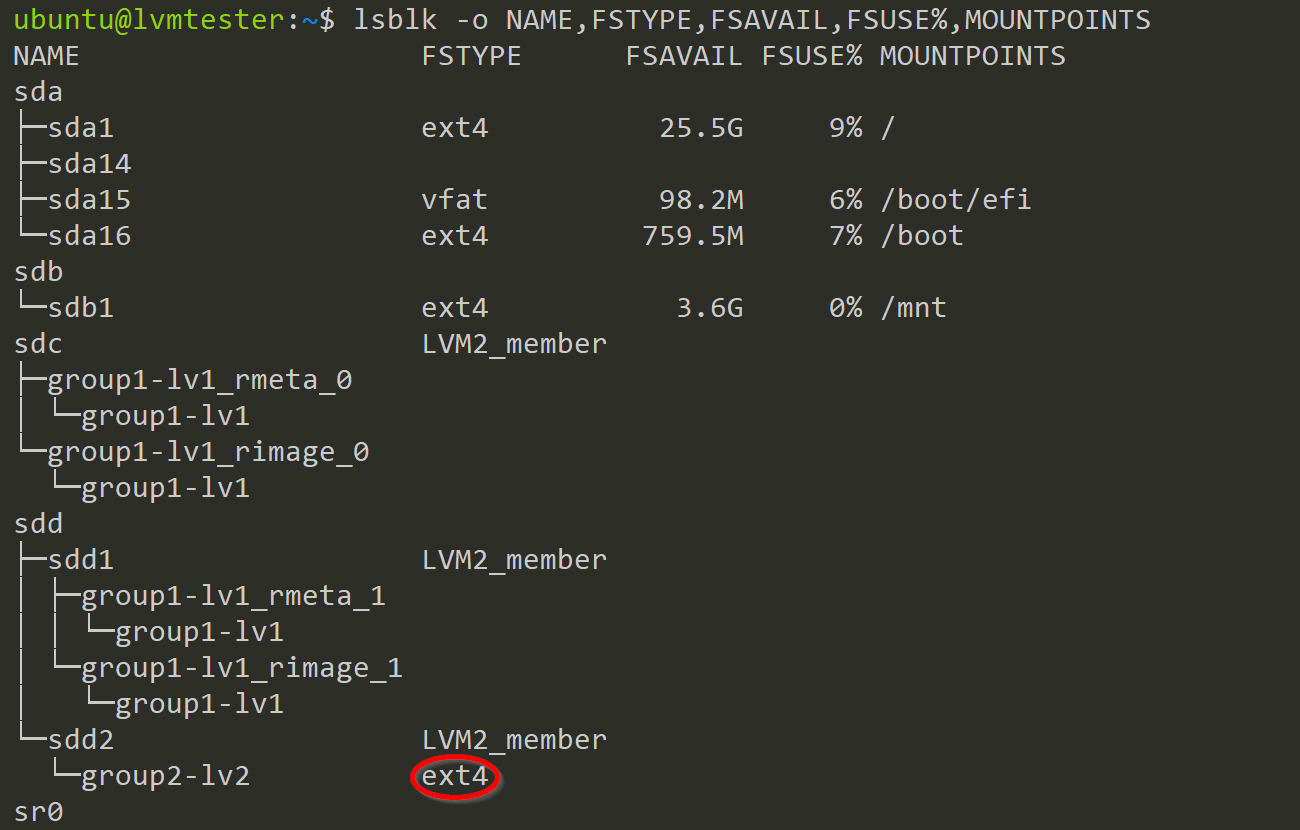
After this, we can modify the lsblk command to show us the newly created File System on the device. This serves as confirmation that the creation was successful, and we can proceed to mount it in the next step.
lsblk -o NAME,FSTYPE,FSAVAIL,FSUSE%,MOUNTPOINTS
Mount the File System
Now, we can create a new directory and then mount the LV device onto it.
sudo mkdir /mnt/lv2

sudo mount /dev/group2/lv2 /mnt/lv2/

lsblk

Now, we have successfully used LVM to add a new mount point to our system where we can store data.
Summary
Below is a short overview of the steps needed to create a File System on an Block Device with LVM.
- (Optional) Create a Partition
- fdisk
- Create a Physical Volume (PV)
- pvcreate
- pvdisplay
- pvs
- Create a Volume Group (VG)
- vgcreate
- vgdisplay
- vgs
- Create a Logical Volume
- lvcreate
- lvdisplay
- lvs
- Create a File System
- mkfs.ext4
- Mount File System
- mount
Next article
In the next article, we will dive deeper into LVM and inspect some additional functionality, such as snapshots and extending LVs. This knowledge can become quite handy if you find yourself in the position of a full LV or in the need of restoring data.
For further questions contact me at: blog@dominiklandau.de
or reach out to me on LinkedIn.